

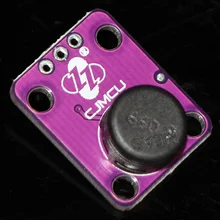
The HS1101 humidity sensor is a cost-effective solution for measuring relative humidity within ±5% accuracy. The sensor’s design is based on a unique capacitive cell; therefore, by using simple RC circuit wiring it is easy to interface with any Parallax microcontroller, including the BASIC Stamp® and Propeller chip.
Specifications
Power requirements: 5 to 10 VDC
Communication: Analog output of varying capacitance in response to change in relative humidity
Humidity Measuring Range: 1 to 99% RH
Operating temperature: -40 to 212 °F (-40 to 100 °C)
Connection
Connect 5v and Gnd to the module
I used Pin 6, you can use any I/O pin you will need to change the code if you do
Code
[codesyntax lang=”cpp”]
/*

Demonstration of the Parallax HS1101 relative humidity sensor (#27920)

The HS1101 sensor acts as a capacitor, and uses the circuit described in the
product documentation to derive an RC (resistor-capacitor) time delay. By
measuring the decay of the capacitor through a resistor, it is possible to
obtain the current relative humidity.

This demo shows the relative humidity (accuracy: +/-3.5%, as noted in product
documentation), along with the RC delay timing. Readings repeat once every ½
second, and are displayed in the Arduino Serial Monitor window.

This example code is for the Arduino Uno and direct compatible boards, using the
Arduino 1.0 or later IDE software. It has not been tested, nor designed for, other
Arduino boards, including the Arduino Due.

Please note: Environmental factors - including use indoors or outdoors, and
above and below typical room temperature ranges -- may affect the accuracy of
the readings. The demo includes an RCdelay calibration value that can be
adjusted against a known working humidity sensor used in the same environment.

Important: the result is based on the clock speed of Arduino microcontroller.
Other versions of Arduino (running at faster or slower clocks) will need
recalibration of the RCdelay value. See comment below.

Refer to the HS1101 product documentation for the connection diagram and
circuit. The output of the sensor is connected to Arduino pin D4.

Tips: The sensor is sensitive to stray capacitance. Keep lead lengths short.
Results may vary when the test circuit is built on a solderless breadboard.
Leads from sensor are slightly undersized for breadboard holes. Make sure
they make adequate contact. When taking readings avoid contact or close
proximity to sensor or bare circuit wires.

*/

int sensorPin = 4; // RC circuit with HS1101 sesnor connected to digital pin D4
long result = 0;
int const RHconstant = 12169; // RH constant

void setup() {
Serial.begin(9600); // Use Serial Monitor window at 9600 baud
Serial.println("Humidiy reading start");
Serial.print("RC delay");
Serial.print("\t");
Serial.println("Humidity");
}
void loop() {
long RCdelay = RCTime(sensorPin); // Take RC time reading of sensor
Serial.print(RCdelay); // Display RC time delay
Serial.print("\t\t");

RCdelay = RCdelay * 215; // Calibation to RC time delay; experiment with literal value
int humidity = (RCdelay - RHconstant) / 24;
Serial.println(humidity / 100, DEC);
delay(500); // Wait 1/2 second for the next read
}

// Standard RC time function
long RCTime(int sensePin){
long result = 0;
pinMode(sensePin, OUTPUT); // Make pin OUTPUT, and turn HIGH
digitalWrite(sensePin, HIGH);
delay(1); // Wait 1 ms delay
pinMode(sensePin, INPUT); // Make sensor INPUT
digitalWrite(sensePin, LOW); // Turn off Arduino internal pullup resistor
while(digitalRead(sensePin)){ // Loop until pin goes low
result++;
}
return result;
}
[/codesyntax]
Link
https://www.parallax.com/sites/default/files/downloads/27920-Humidity-Sensor-Datasheet.pdf
CJMCU-1101 HS1101 humidity sensor RELATIVE, HUMIDITY, SENSOR