

In this example we show how you connect a photoresistor to an Arduino, the value read from the photoresistor corresponds to the amount of light present. The photoresistor is connected to analog pin 0 in this example.
A practical example could be a dark room sensor for photography, if the reading approached a critical level an alarm could be activated or even a night light
Here is our sensor, its part of the 37 in 1 sensor kit I mentioned in another post.
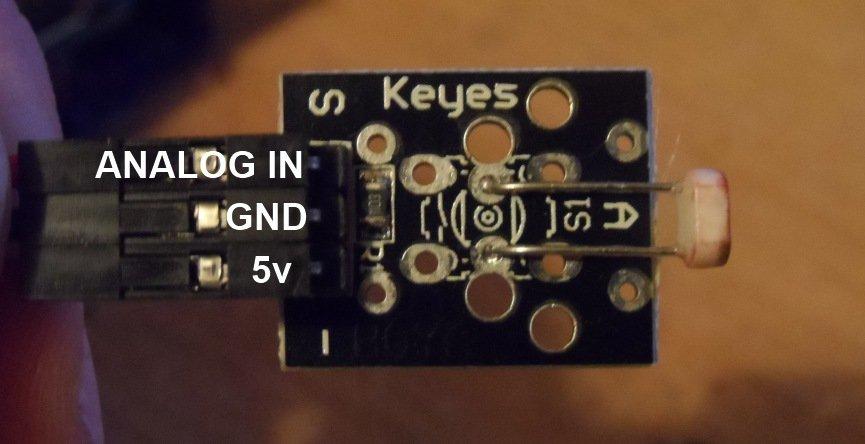
LDR sensor
Schematic
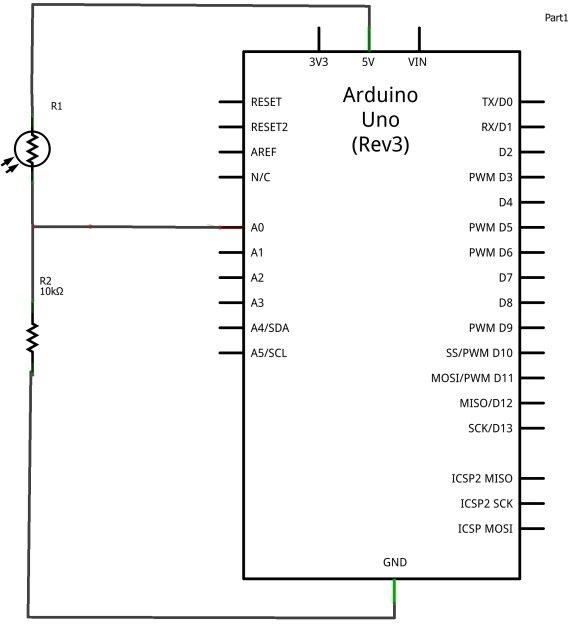
arduino and photoresistor example
Code
In this example we simply output the reading via the serial port. You can monitor this in the Serial Port Monitor
int sensorValue;
void setup()
{
Serial.begin(9600); // starts the serial port at 9600
}
void loop()
{
sensorValue = analogRead(0); // read analog input pin 0
Serial.print(sensorValue, DEC); // prints the value read
Serial.print(” \n”); // prints a space between the numbers
delay(1000); // wait 100ms for next reading
}
In this example we check the value returned by the photoresistor, if it drops beneath a certain value we switch the onboard LED on, if it goes above this value the LED will switch off
int sensorValue;
int led = 13;
void setup()
{
pinMode(led, OUTPUT);
}
void loop()
{
sensorValue = analogRead(0); // read analog input pin 0
//daylight was 700 – so lets detect a reading under 300
if (sensorValue < 300)
{
digitalWrite(led, HIGH);
}
else
{
digitalWrite(led, LOW);
}
delay(1000); // wait 100ms for next reading
}
Links
You can just buy some photoresistors, they are cheap items
Photoresistors on Amazon US
Here are links to the sensor kit
Ultimate 37 in 1 Sensor Modules Kit for Arduino from Amazon UK
Ultimate 37 in 1 Sensor Modules Kit for Arduino from Amazon US