

Being interested in various microcontrollers means we purchase lots of modules, development boards and sensors. One of these is the ARduino of which we have purchased many different shields, as part of a basic exercise I decided to see how easy it would be to connect the LCD Keypad shield to an ATMEGA16
The first step is to create a breakout for the Arduino shields on veroboard, you then need solder a set of pins which you can connect to your ATmega16 port pins, some shields have a set of pins that can be used. Here is my setup you can see the shield at one end and the ATmega16 breakout board at the other and the interconnecting wire
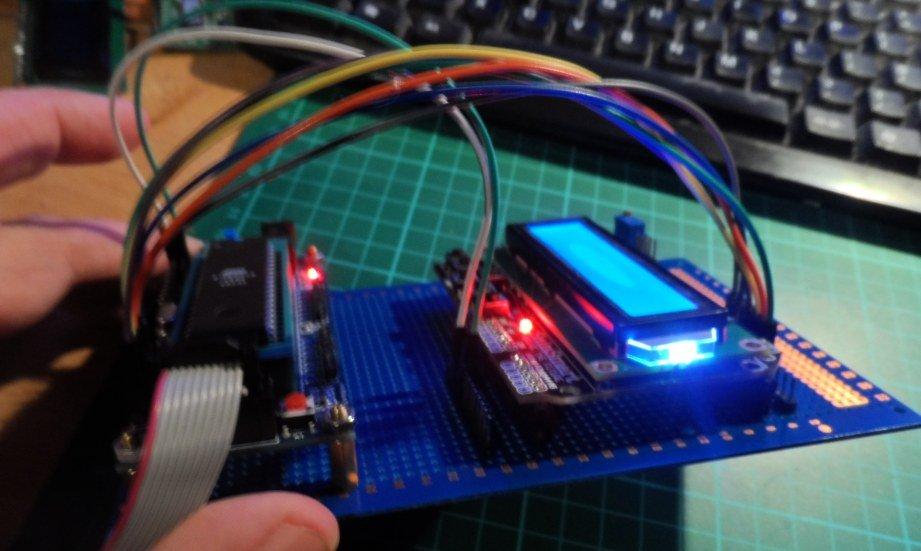
atmega16 and lcd
LCD Shield
Here are the pin connections and details of the shield
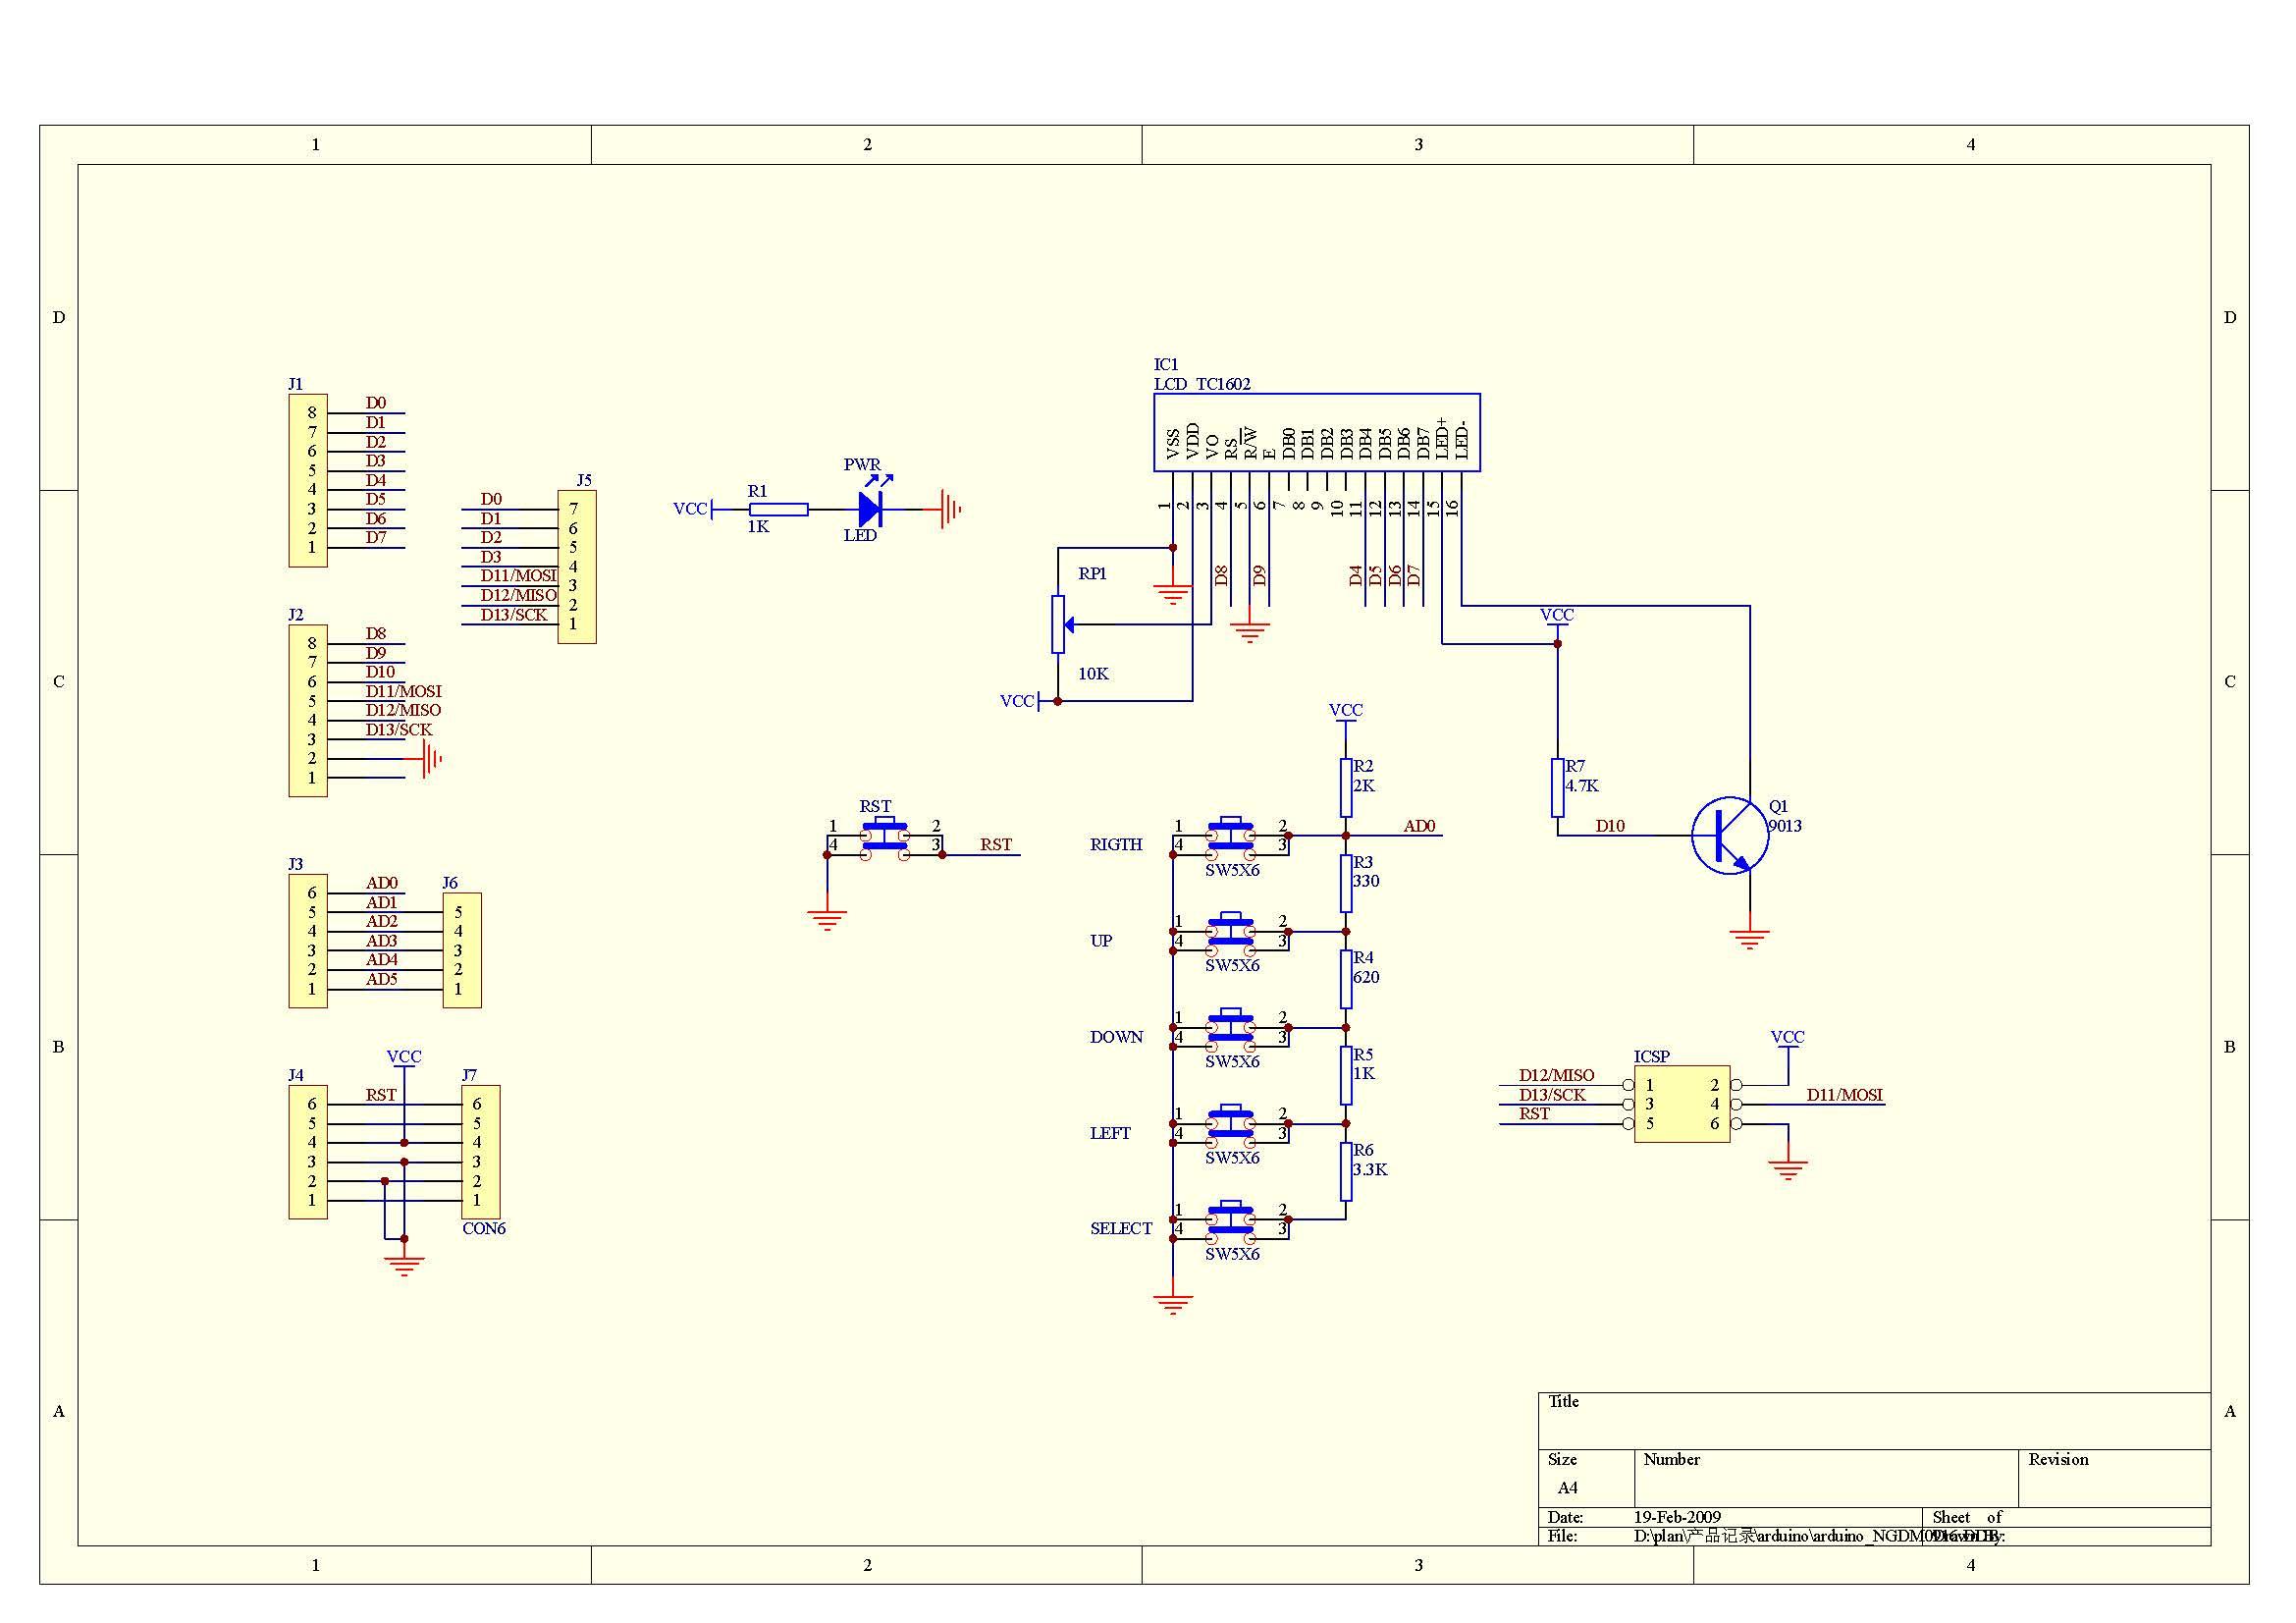
lcd shield schematic
| Pin | Function |
| Analog 0 | Button (select, up, right, down and left) |
| Digital 4 | DB4 |
| Digital 5 | DB5 |
| Digital 6 | DB6 |
| Digital 7 | DB7 |
| Digital 8 | RS (Data or Signal Display Selection) |
| Digital 9 | Enable |
| Digital 10 | Backlit Control |
Code
The code was written in mikroC PRO for AVR
sbit LCD_RS at PORTD2_bit;
sbit LCD_EN at PORTD3_bit;
sbit LCD_D4 at PORTD4_bit;
sbit LCD_D5 at PORTD5_bit;
sbit LCD_D6 at PORTD6_bit;
sbit LCD_D7 at PORTD7_bit;

sbit LCD_RS_Direction at DDD2_bit;
sbit LCD_EN_Direction at DDD3_bit;
sbit LCD_D4_Direction at DDD4_bit;
sbit LCD_D5_Direction at DDD5_bit;
sbit LCD_D6_Direction at DDD6_bit;
sbit LCD_D7_Direction at DDD7_bit;

void main()
{

PORTD = 0;
Lcd_Init(); // Initialize LCD
Lcd_Cmd(_LCD_CLEAR); // Clear display
Lcd_Cmd(_LCD_CURSOR_OFF); // Cursor off
Lcd_Out(1,1,"Hello world"); //Write the word mikroC on the LCD
Delay_ms(300);
} // end main
Links
LCD Keypad Shield LCD1602 Module Display
ATMEGA16 AVR Minimum System Board