

This example uses a LCD shield that I bought from Amazon UK, its quite a common one and many people sell this and I’ll supply an example link later in the article.
Here is a picture of the LCD

lcd keypad shield
As you can see its a nice little board and also has some push buttons attached, we will be using these in a later example.
Anyway down to business, for this example you will need the LCD library to make this work, again we will supply this and a link will be made available at the bottom of the article, once you have this extract the contents into the folder and copy it into your Arduino\Libraries folder location. My path was C:\Program Files (x86)\Arduino\libraries\LCD4Bit_mod.
Now here is the code for the example
#include <LCD4Bit_mod.h>
//create object to control an LCD.
//number of lines in display=1
LCD4Bit_mod lcd = LCD4Bit_mod(2);

int led = 13;

void setup()
{
 pinMode(led, OUTPUT);
 lcd.init();
 lcd.clear();
 lcd.printIn("KEYPAD test");

}

void loop()
{
 digitalWrite(led, HIGH); // turn the LED on
}
A fairly simple example, we use the LED as a means to show that we have successfully uploaded our sketch. There are 3 functions for the LCD in this example which are quite obvious
lcd.init(); – This initialises the LCD display, cursor, clear the screen and blink settings for example.
lcd.clear(); – Clear the LCD display
lcd.printIn(“KEYPAD test”); – This displays the text you wish to display
Lets see the result on the LCD
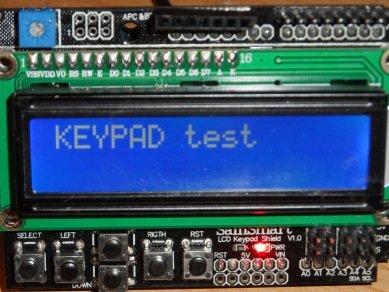
lcd output
If you are interested the code for the library is supplied and you can dig into what the functions do in more detail.
Links and Downloads
SainSmart LCD 1602 Keypad Shield from Amazon.com
LCD4Bit_mod arduino library